
Customizing keycaps has become a popular trend among keyboard enthusiasts, allowing users to add unique designs, symbols, or text to their mechanical keyboards. Engraving keycaps is one of the most effective ways to achieve this level of customization, offering durability and a premium look. If you are wondering what tools and techniques to use for engraving keycaps, this guide will provide you with everything you need to know, including the best tools, engraving methods, and expert tips.
TRENDING
What Is A Hedgehog Trophic Level? A Simple Explanation
Why Engrave Keycaps?
Engraving keycaps serves multiple purposes beyond aesthetics. Here are some reasons why keyboard enthusiasts and professionals opt for engraved keycaps:
- Personalization – Create a unique keyboard layout with custom legends, symbols, or artwork.
- Enhanced Durability – Unlike printed keycaps, engravings don’t fade over time.
- Tactile Feedback – Engraved keycaps offer a distinct feel, enhancing typing experience.
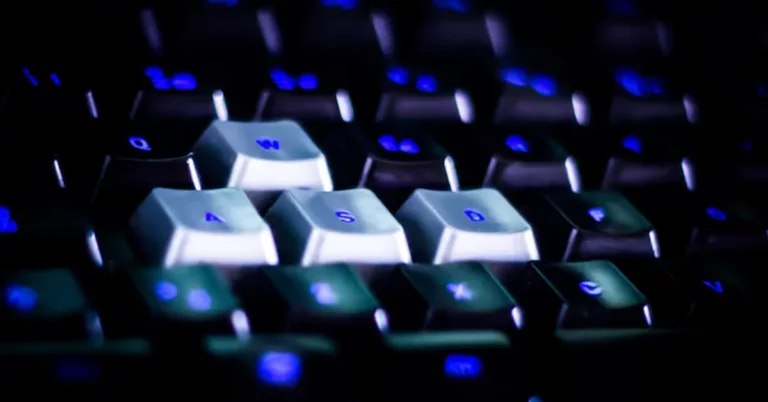
- Improved Visibility – Laser engraving on backlit keycaps allows light to shine through, making legends clearer in low-light settings.
Best Tools For Engraving Keycaps
There are several tools available for engraving keycaps, ranging from professional laser engravers to manual hand tools. Below is a breakdown of the best tools based on precision, affordability, and ease of use.
Laser Engraver
Best for: High precision, professional results, and backlit keycaps.
Recommended Models:
- Ortur Laser Master 3
- Glowforge Basic
- xTool D1 Pro
Pros:
- Extremely precise and detailed engraving
- Works on various keycap materials like PBT and ABS
- Can create legends, symbols, and custom artwork
- Ideal for backlit keycaps
Cons:
- Expensive upfront cost
- Requires ventilation due to fumes from burning plastic
Dremel Rotary Tool with Engraving Bits
Best for: Budget-friendly, DIY projects, and textured engravings.
Recommended Bits:
- Diamond-tipped bits for fine engraving
- Carbide bits for deeper cuts
Pros:
- Affordable compared to laser engravers
- Allows for freehand engraving
- Works on plastic, metal, and wood keycaps
Cons:
- Less precision compared to laser engraving
- Requires a steady hand for detailed work
CNC Engraving Machine
Best for: Bulk customization, deep engravings, and professional use.
Recommended Models:
- Genmitsu CNC 3018-PRO
- SainSmart 3018-PROVer
Pros:
- Automated precision cutting
- Can engrave on metal, plastic, and acrylic keycaps
- Great for mass production
Cons:
- Requires CAD software for design
- More expensive than manual methods
Hand Engraving Pen
Best for: Simple designs, budget DIY projects, and hobbyists.
Recommended Models:
- Uolor Electric Engraving Pen
- Dremel Engraver 290
Pros:
- Very affordable
- Easy to use for beginners
- Portable and lightweight
Cons:
- Limited precision
- Takes longer to complete intricate designs
Chemical Etching
Best for: Professional-grade customization and fine details.
Recommended Chemicals:
- Ferric chloride (for metal keycaps)
- Acetone (for ABS keycaps)
Pros:
- Can create highly detailed patterns
- Permanent and wear-resistant
Cons:
- Requires careful handling of chemicals
- Not suitable for all keycap materials
Best Practices For Engraving Keycaps
Choose the Right Keycap Material
Keycaps are made from different materials, and not all are suitable for engraving.
- PBT Keycaps – Best for laser and CNC engraving due to their durability.
- ABS Keycaps – Can be engraved but prone to melting if high heat is applied.
- Metal Keycaps – Ideal for CNC or chemical etching but require specialized tools.
Use a Guide or Template
If using a manual engraving tool, stencil guides or templates help ensure precision and uniformity in your design.
Secure the Keycap Before Engraving
Using a vise or clamp to hold the keycap in place prevents movement and ensures more accurate engraving.
Test on Scrap Keycaps First
Before engraving your primary keycaps, practice on spare keycaps to perfect your technique and tool settings.
Work in a Well-Ventilated Area
Engraving plastics can produce fumes, so ensure proper ventilation, especially when using a laser engraver or chemical etching.
Post-Engraving Finishing Touches
After engraving, enhance the design with:
- Acrylic Paint – Fills the engravings for a colored effect.
- UV Resin – Seals the engraving for a glossy finish.
- Sandpaper (Fine Grit) – Smoothens rough edges.
Conclusion
Engraving keycaps is an excellent way to personalize your keyboard and enhance its aesthetics. Whether you choose laser engraving, a Dremel tool, CNC engraving, or chemical etching, selecting the right tools and following best practices will ensure high-quality results. Experiment with different methods and unleash your creativity to craft a one-of-a-kind keyboard that reflects your unique style.
ALSO READ: What Is Anisometropia In Toddlers Causes Symptoms And Treatment
FAQs
What is the best method for engraving keycaps?
The best method depends on your budget and desired precision. Laser engraving offers the highest precision, while a rotary tool is a cost-effective DIY option.
Can I engrave keycaps at home?
Yes, you can engrave keycaps at home using a Dremel, hand engraving pen, or a small laser engraver. Just ensure proper safety precautions and ventilation.
Which keycap material is best for engraving?
PBT keycaps are the best choice for engraving as they are durable and resistant to heat, making them ideal for laser and CNC engraving.
Does laser engraving work on backlit keycaps?
Yes, laser engraving is perfect for backlit keycaps as it removes the top layer, allowing light to shine through the engraved areas.
How can I make my engravings more visible?
You can fill the engravings with acrylic paint, use UV resin for a glossy effect, or backlight the keycaps if they are transparent.